Introduction
Single page web applications are an important part of modern web development. Users expect web applications to function much more closely to their desktop counterparts. This includes both PC and mobile-based devices. With the challenges of single page web application development, there have been a number of frameworks that have arisen to help rapidly create and deploy these types of projects.
Two of the more popular frameworks for developing single page web applications include angularjs, and meteor. There are, of course, many other frameworks as well. In this tutorial, we’ll walk through the steps to create your first single page web application with meteor.js. There is an excellent starter tutorial on the meteor web site, although the tutorial in this article will focus on some of the more specific subtleties and security considerations for deploying a site online.
Should I Learn Meteor.js?
An excellent question to always ask before delving into a new web framework, is whether it’s worth taking the time to learn a new set of development skills. As there are many competing web frameworks for creating applications, it’s helpful to master at least one or two. However, learning new frameworks is an excellent way to stay up-to-date. In this regard, let’s consider the pros and cons of a web application based upon Meteor.
Accessing the Database by a REST Service
Meteor is based upon node.js and mongodb (it’s actually a layer on top of node.js). Traditionally, developers can use the MEAN stack (mongodb, express, angularjs, node.js) to develop on the node platform. The key framework in the MEAN stack is Express. With Express, a developer would typically create a REST service, consisting of CRUD methods for getting and saving data from mongodb. This process includes selecting a means of accessing the database, whether via an ORM such as mongoose or the mongo driver directly. Of course, a mongo database would also have to be created and connection string information added into the application.
By contrast to Express, Meteor removes the need to create a REST service for manipulating the database. In fact, Meteor comes with a built-in instance of mongodb. Upon starting a meteor application, the database is automatically created and may be bootstrapped with initial data. This provides an immediate head-start to beginning development.
Single Page Application Navigation
Outside of meteor, it is usually required to add necessary libraries or modules for supporting single page navigation. For example, with angular.js, you would include a script tag, declare the proper routing information, and create the necessary html view templates. With angular.js, your master page would load the view template for the current url route.
Meteor automatically provides single page navigation, out of the box. By declaring a router configuration and creating named html template files, single page navigation is enabled automatically. As another time-saver, rather than mapping specific html view templates to routes, Meteor does this automatically simply by matching the name of the route with the name of the html view template. This is another great head-start.
Database Security
Security is an important part of any web application. In a non-meteor web application, security and permissions are typically added within the REST service where the database is accessed. This type of security offers a lot of flexibility for customization, since you can pick and choose exactly where security checks will go.
Meteor, by contrast, has very loose security from the start. By default, the database is accessible and modifiable from the client. In fact, it can be accessed simply by entering mongo query commands in the Javascript debug console of the web browser! This is available as a convenience, rather than as a mandate. However, because most web applications are intended to be deployed, it can be common to immediately disable “auto-publishing” (the ability to access db data from the client) and “insecure” (the ability to modify db data from the client) from the start.
When meteor’s autopublish and insecure is disabled, you’ll be required to specify individual collections via the server, that can be accessible to the client. You’ll also likely create meteor methods for accessing the database, which in turn, is similar to creating a REST service. In this regard, meteor is not necessarily saving time, although for rapid development, it’s ultimately up to the developer to decide.
Client vs Server
In a typical web application framework, code written for the client is usually contained within a javascript file, like script.js. This file is simply included in the main html master page or layout. You would usually include jquery, angular, or any other client-side calls within these types of scripts. You would also have separate javascript (node.js) or C# files (.NET) that contain server-side code for accessing data and performing computations. The files are clearly separated and there is a hard-line drawn between the two.
Meteor.js blurs the line between client and server. By default, the main application javascript file contains both client and server code within it, separated by an if/then to designate client-side vs server-side only logic (of course, you can maintain the code in separate files, if you choose). This blurring of states is part of how meteor is able to provide maximum speed for updating the UI after server-side data operations. One such construct is latency compensation, where meteor will simulate and database operation on the client and update the UI instantly. The call will then be executed in the server-side code and the UI finally updated with any mismatch in the result.
File and Folder Layout
While Express, angular, and other frameworks usually do not require a specific folder layout, meteor has more specific uses for named folders. Some of the more common folders, and their uses, include:
client - This folder contains anything accessible to the client browser, including HTML views, single page application view templates, css, and javascript files. Files in this folder will be embedded into the application (so there is no need to add script tags for .js files in this folder).
collections - Contains javascript files that build the mongodb collections.
public - Contains static files to be accessible on the web site, such as images, documents, or other content.
server - Contains code to be executed on the server-side of the application. This includes code to initialize the mongodb data, as well as specifying which collections and sets of data should be publicly available for client-side operations.
[root] - The root folder of the project contains javascript files that are executed on both the client and the server. Files contained within this folder usually contain an if/then to specify which code should run on the client vs the server. You usually place code for handling the main application, UI events, and server methods within this folder.
Real-time Compilation and Builds
During development, changes to any files within the project folders will be detected by meteor.exe and automatically recompiled into the project, causing the web browser to refresh. This is convenient for automatically seeing changes during development. However, for some developers, it may also be a hinderance. A typical rebuild and refresh can take a couple of seconds, even for a simple css or script change. In a traditional development environment, after modifying a css or script file, one would simply refresh the browser to instantly see the change, which could be much quicker than a recompile by meteor.
SEO and Search Engine Optimization
Now, this is a real problem with not just meteor.js, but all dynamic javascript-based single page web applications. Search engine bots such as Googlebot, Bing, and others, expect to be able to read the html and text of pages across a web site and obtain metadata and descriptive text about each page. This includes reading meta-tags in head of the page, unique titles, keywords, and content. However, single page web applications hide this information from the source code of the browser (it simply doesn’t exist at render time of the layout page), and instead, render the content dynamically upon request of each view. The browser has no problem rendering the text. The user has no problem seeing it. However, since many search engine crawlers and robots do not execute javascript, the bots can’t see it.
SEO isn’t just a problem for meteor.js. It’s also a problem for other frameworks, as well. This includes meteor.js, angular.js, ember, and others. There are 3rd-party web services that will function as an in-between for the web site and search engine crawlers. These services will spider your dynamic site, execute the javascript as a client, and index the html of the pages and views. You can then call the service before you render each route and choose to output the cached HTML from the service or the dynamic content. This may be a solution in some cases, although it seems more of a hack work-around for a larger issue. Aside from this, it’s probably functionality that the search engine crawlers should be performing themselves.
Some meteor.js users recommend using the spiderable module to tell the search engines to execute javascript on the site. This module adds the following meta tag to your site:
1 | <meta name="fragment" content="!">t; |
This tag tells Google to request the site with a special query string parameter “?_escaped_fragment_=”, allowing your dynamic single page web application to respond differently to search engines. You can even test how your site looks to the search bots by appending this parameter to your url. This technique is actually a form of cloaking, but from an SEO white hat perspective. Some users claim success with this, while others say it’s prone to errors.
The real issue here with SEO in dynamic javascript-based applications is a problem of transition. Web sites are beginning to move from traditional static sites, browsed from a desktop computer, to dynamic ones, often visited by mobile devices. Web sites are becoming more dynamic and real-time than ever before. In fact, many users find sites not by using a search engine, but rather from sharing links on social networks such as Facebook or Twitter. Whether or not search engines are actually being used less, you’ll still want to seriously consider how to best implement SEO for your meteor.js site.
Deployment with Heroku and MongoLab
Deploying a web application with any of the frameworks is a very straight-forward process. This usually involves creating the mongo database either locally or on a cloud host provider, checking in code to a repository like GitHub, and then setting up the instance on Heroku or any other web provider.
While these steps are the same for meteor, there are some subtleties. First, remember that meteor contains a self-included mongo instance during development. It’s easy to forget this when getting ready to deploy. You’ll actually need to specify a url for your mongo database provider so that the application knows where to store data.
For meteor, you’ll need to specify a configuration parameter for MONGO_URL that contains the mongo connection string. You’ll also need to specify a ROOT_URL that points to your hosted single page web application’s url. Finally, a build-pack may be required for your hosting provider (for example, Heroku). The build-pack bundles the meteor code as a native node.js application, for execution on the server.
With the configuration settings provided, deploying an application is no different than other frameworks. Particularly, with Heroku, you can set up continuous deployment by connecting to your github account.
Installing Meteor
Now that you’ve decided whether it’s important to learn meteor.js or not, we’ll dive into the tutorial. Let’s start by installing meteor.
Once installed, create your first application by opening a console window, and typing: “meteor create helloworld”. This creates a new folder named, “helloworld”.
In the console, move into the folder. Then type “meteor” in the console to begin running it and see how it looks. Once meteor is running, open a web browser and navigate to http://localhost:3000 to see it in action. Note, any change you make to the files in the folder will cause meteor to instantly recompile and reload the page. This is part of the instant deployment during development.
Setting up our Data
Let’s now set up a simple database. Inside the helloworld folder, create a new folder named “collections”. In the collections folder, create a file named people.js. For the contents of this file, include the following:
1 | People = new Mongo.Collection('people'); |
The above code tells Meteor to create a collection named “people”. You may notice that upon saving the file, meteor automatically rebuilds the application.
Having a database collection is great, but without data it’s not very useful. Let’s move on to populating the data.
Hacking the Database from the Client
At this point, the application is very insecure. If you open a web browser developer console (in Chrome, press F12), you can enter the following javascript on the client and actually insert data into the db!
1 | People.insert({ name: 'Harry', color: 'Blue' }) |
After hitting return on each insert statement, you’ll see a response containing the mongodb id for the new record. Yes, we’re actually modifying the mongo database on the client. To prove this, type the following query to list the records that we’ve created in the database:
1 | People.find().fetch()[0] |
Output:
1 | Object {_id: "5qBsYok4dfEG4ewMe", name: "Harry", color: "Blue"} |
Populating a Mongo Collection with Data
Manually adding data to the mongo database is convenient (although highly insecure) during development. However, let’s streamline this process by making it automatic. This will allow us to delete the database and start over as many times as we need to, during development.
In the base helloworld folder, create a new folder named, “server”. Inside the “server” folder, create a new file named “data.js”. Add the following to the data.js file:
1 | Meteor.startup(function() { |
Save the file and meteor will rebuild the application. Now, in the web browser console, try typing in the find statement again, to list all database records for the People collection.
1 | People.find().fetch() |
The result will output 2 objects. But, wait a second. Didn’t we just add 3 objects to our data.js file to populate the database? This is true. However, notice that the code inside data.js is wrapped with an if/then statement that checks if the People collection has 0 records. If it already contains data, the code is never executed. So, let’s delete everything in our mongo database and see if the data populates automatically.
In the console, hit CTRL-C twice to exit meteor.exe and stop the web server. Next, type “meteor reset”. This deletes the mongo database. Finally, type “meteor” to launch the web server again.
Now, if you try the find command People.find().fetch() in the web browser console, you should get 3 objects returned. Meteor correctly executed our sample data and inserted the items into the mongo database. We’ve successfully set up our single page web application with initialized data for our database.
Adding a Master Layout
Let’s change the HTML of the application. We’ll start by adding a master layout, which will serve the individual single page web application view templates.
First, in the root “helloworld” folder, delete the files helloworld.css, helloworld.html, and helloworld.js.
Next, create a folder named “client”. Inside the client folder, create a file named “app.head.html”, with the following contents:
1 | <head> |
This file simply specifies a fragment of HTML to place in all web page views. Next, it’s time to make a master layout for our application.
Inside the “client” folder, create another folder named “views”. Inside this folder, create a folder named “layout”. In the layout folder, create a file named “layout.html”. Enter the following for its contents:
This creates a master layout for all web page views. The “yield” keyword is where the content from our partial views will be rendered. This is the key behind the single page navigation of meteor web applications.
Adding Our First View
We now have a master layout page, but we still need some views. Let’s create our home view. Inside the “views” folder, create a file named “home.html”. For the contents of this file, include the following:
The above HTML includes some text and references a sub-control, in which we’ll place some form fields for adding new people.
Inside the “views” folder, create another folder named “controls”. We’ll now create the sub-control to render our form. In the “controls” folder, create a file named “helloForm.html”, with the following contents:
1 | <template name='helloForm'> |
This is a simple form for adding a new person to the database. Notice, we’ve also included HTML5 validation attributes to specify the textbox fields as required.
Let’s add one more view, just so that we have something to navigate between (to demonstrate the single page application navigation in meteor).
In the “views” folder, create another file named “about.html”, with the following contents:
1 | <template name='about'> |
Great! Our web page views are ready. Let’s setup the routing so that we can actually run the app and see the pages display.
Setting Up Routing
In the root “helloworld” folder, create a file named “client.js”. For the contents, include the following:
1 | if (Meteor.isClient) { |
Next, in the console, hit CTRL-C twice to quit the meteor.exe process. Then type: “meteor add iron:router”. This will add the routing package to the application. Finally, type “meteor” to launch the web application again. Refresh your web browser and you should see the web page displayed.
If you try clicking the links “About” and “Home”, you’ll see how the application seamlessly navigates between the two views, without refreshing the page or reloading urls. This is the single page web application navigation in action.
Setting a Dynamic Page Title per View
You can add the following code to set a dynamic title for each view page on your site. Keep in mind, these titles are not static, so they may not provide perfect SEO for the search engines (see topic above about search engine optimization), but it at least offers title navigation for users viewing the site.
1 | Router.onAfterAction(function() { |
Next, let’s display our list of people from the database.
Displaying Data
Let’s show the list of people on our home page, just above the form. To do this, we’ll need to create another partial view control. Inside the folder “helloworld/client/views/controls” create a file named “people.html”. Add the following contents to the file:
Let’s include this new view in our home page. Edit the file “helloworld/client/views/home.html” so it renders the new control, as follows:
Finally, we need to give the template access to the data for People. We can do this with a simple helper method. Edit the file “helloworld/client.js” to contain the following:
1 | if (Meteor.isClient) { |
The block of code above, next to Template.people.helpers, is where we assign a method “people” that is accessible by the HTML view template. This returns our list of people from the database. We can then iterate over the records directly in the view, within the “each” loop.
Meteor should have automatically refreshed your web page at this point, so you should now see the list of people displayed, just above the form. We’re making progress!
It’s Time for Security
Now that we’re making data accessible to the web page, it’s probably about time that we’ve locked down the security for our application.
In the console, hit CTRL-C twice to quit the meteor.exe process. Next, we’ll remove “autopublish”, which allows reading the database from the client, and “insecure”, which allows unrestricted editing of the database from the client.
In the console, type “meteor remove autopublish” and then “meteor remove insecure”. Finally, type “meteor” to launch the web application again.
Reload the web page and you’ll notice that the list of people is missing! If you hit F12 to open the web browser console and try querying of data on the client with “People.find().fetch()”, you’ll notice that no records are returned. Additionally, try executing “People.insert({})” and you’ll receive an “Access denied” error. Don’t worry, our data is still there. It’s simply locked down now.
Let’s give explicit access to our people collection by having the server-side code delegate access.
Opening Access for People with Publish and Subscribe
Edit the file “helloworld/server/data.js” and add the following line to the top of the file, inside the Meteor.startup() block:
1 | Meteor.publish('People', function() { |
This block of code opens access to allow the client to query the People collection. We can finely-tune the query to return certain subsets of the data. However, for this tutorial, we’ll just return the whole collection.
At this point, we’ve opened access to the People collection. This is called “publishing” the collection. Now, we need to “subscribe” to the collection on the client.
Edit the file “helloworld/client.js” and add the following to the top of the file, inside the “if (Meteor.isClient)” statement:
1 | // Setup database access. |
Meteor should have automatically rebuilt the application and refreshed your web page. If you look at the page, you should now see the list of people being displayed again. In addition, if you open the web browser developer console, you can once again execute “People.find().fetch()” and see 3 objects returned. However, you still can not execute People.insert({}) without getting an “Access denied” error.
Let’s add support for inserting people into the database.
Adding an Event Handler for Clicking a Button
To add a person into the database, we first need an event for clicking the “Add” button. Create a new file in the root “helloworld” folder, named “events.js”, with the following contents:
1 | if (Meteor.isClient) { |
The above code sets up an event handler for the “Add” button submit event. Meteor event handlers work by binding to a template, which in this case is “helloForm”. You then specify the events to listen to. We’re listening to a “submit” event. You can also include jquery-style selectors, such as ‘click #myButton’ for a click event on the id ‘myButton’.
To specify multiple event handlers for the template, separate the selectors by a comma. For example, to handle events for a submit, button click, or class name click, use the following syntax:
1 | Template.helloForm.events({ |
Inside our simple event handler code for the submit event, we’ve included Meteor.call(‘addPerson’). This tells Meteor to delegate execution to a method function. Meteor method are executed on both the client and server, which enables latency compensation (as described earlier in this article). This is how meteor can instantly update the UI according to state changes in the data, and handle discrepancies in the data at a later time. Let’s create the method now.
Creating a Meteor.js Method for Inserting into the Database
Inside the root folder “helloworld”, create a file named “methods.js” with the following code:
1 | // This code runs on the client and server to enable latency compensation (the security of server code and no round-trip delay). See https://www.meteor.com/tutorials/blaze/security-with-methods for details. |
The above code provides an “addPerson” method that can be used to insert a record into the database in a secure and permission-aware manner. In this tutorial, we’re not checking security of the user. However, you could easily extend the above code to check the userId. For example:
1 | // This code runs on the client and server to enable latency compensation (the security of server code and no round-trip delay). See https://www.meteor.com/tutorials/blaze/security-with-methods for details. |
Although we’re not using the above code, that example checks for the presence of a logged-in user via Meteor.userId(). It also sets the field “user” for the record inserted into the database, providing the potential to query for people created by the logged-in user.
Notice how the method code uses wrapAsync() around the mongo database call. This is required because mongo methods (like many javascript modules) are executed asynchronously. However, this conflicts with meteor’s asynchronous vs synchronous method calls.
Usually, when calling a method to insert a record, you’ll want to make some UI updates after the call completes. One way of doing this is with reactive variables. However, another way is by ensuring the synchronous execution of the Meteor method call by wrapping it, as shown above. After the database call completes, the id of the record is returned in the callback. Finally, the callback result is returned back to the caller in the client-side event function. We’re simply outputting the record id to the console via console.log(), but you could update the UI or perform other logic with the returned id, as well.
At this point, your web browser should have refreshed and you can now enter a value for Name and Color. Upon clicking the “Add” button, a new person should instantly appear in the list, without any page refresh! Again, the beauty and simplicity of single page web application navigation.
Adding a User Login
So far, anyone can add new people to our Meteor js single page web application. Let’s add a login feature, so that users can create an account. In addition, let’s restrict permissions so that only users that are logged are able to add new records.
At the console, hit CTRL-C twice to exit the meteor.exe process. Type: “meteor add accounts-password” then type “meteor add accounts-ui”.
Meteor really excels at making login integration a breeze. Edit the file “/helloworld/client/views/layout/layout.html” and modify the html as follows:
Notice that we’ve added a control, loginButtons. This renders the built-in user login accounts controls. There are different ways to style these controls, but we’ll use the simplest for this tutorial.
Restricting Modifying Data to Logged-In Users
Our data is still open to anonymous users. Let’s now restrict it only to logged-in users. Edit the file “helloworld/methods.js”, as follows:
1 | // This code runs on the client and server to enable latency compensation (the security of server code and no round-trip delay). See https://www.meteor.com/tutorials/blaze/security-with-methods for details. |
The only change to our method is the addition of checking the Meteor.userId() and setting the userId on the record that we’re inserting. Now, go ahead and try typing in some data and clicking “Add” in the application. Nothing happens! Hit F12 and check the web browser developer console. You should see an error displayed, noting “not-authorized”. The application is refusing to add a record, until you’re logged in. So, let’s do that now.
In the web page, click the new “Sign in” link. Click “create account”. Enter an email address and password. Meteor will securely save the user data in the mongo database collection, “users”. There is no need to worry about encrypting and salting passwords, forgotten passwords, changing passwords, or other user management. It’s mostly all taken care of automatically by the Meteor.js framework.
Now that you’re logged in, try adding a person. It should succeed. Not only that, the record will have your userId attached to it.
Displaying Records From Our User
We can make one final neat change to show records created by our user. Anonymous users will see people created by no particular user, while logged-in users will see both their own records, and anonymous records.
Edit the file “helloworld/server/data.js” and change the Meteor.publish(…) code to include a query, as follows:
1 | Meteor.publish('People', function() { |
The above query checks if a person record has a user field set. If it does, it only returns those that match the current userId. It also returns records with no userId (anonymous user records, created in our sample data).
Make one final change to “helloworld/client/views/controls/people.html” so that we can show an asterisk next to records created by our user:
We’ve included a simple Meteor.js template conditional in the view. This just checks if a “user” field exists on the record, and if so, displays the asterisk.
Back on the web page, you should now see all anonymous records, as well as your own user’s created records with an asterisk beside them.
Click your username and select “Sign out”. The list of people should update to only include anonymous records.
Have some fun. Click “Sign in” and create another account. Add some new person records to the data, just for this user. Then sign out and sign back in as the first user. You can see the data toggle back and forth between the users, as records are shown according to those owned by the particular user. Cool!
Deploying a Meteor.js Application to Heroku and MongoLab
We’ve finished our single page web application and now it’s time to deploy. First, you’ll probably want to create an external mongo database with a cloud provider. You’ll only need to create a mongo database. You can leave the collections empty, as our application will insert these automatically.
Next, setup an application on Heroku or your desired web host provider. If using Heroku, you can execute the following command to create an application and configure the Meteor build-pack:
1 | heroku create --buildpack https://github.com/jordansissel/heroku-buildpack-meteor.git |
This will create a new application on Heroku with the build-pack already set to bundle a Meteor app for hosting with node.js.
Login to Heroku and edit the Settings for your application. Click the button “Reveal config vars”. Add the following 3 config vars (you should see “BUILDPACK_URL” already there):
BUILDPACK_URL: https://github.com/jordansissel/heroku-buildpack-meteor.git
MONGO_URL: mongodb://username:password@ds123456.mongolab.com:12345/databasename
ROOT_URL: https://appname.herokuapp.com
Push your source code to the service or connect your GitHub account for continuous deployment and the Meteor app should build and deploy successfully. Upon launching the first time, your data.js file will execute and automatically insert the sample data into the database.
As one final note, depending on your web host provider, you may want to force SSL on your site, so that all requests run under HTTPS. You can do this at the console by typing: “meteor add force-ssl” and then re-deploying your code.
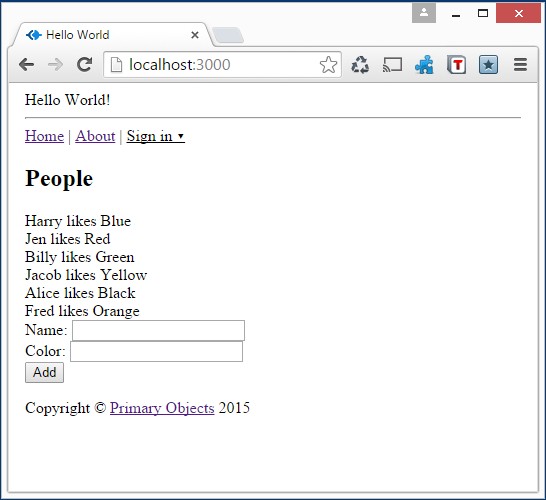
Congratulations, you’ve built and deployed your first Meteor.js app! Here’s mine.
Download @ GitHub
Download the project source code on GitHub by visiting the project home page.
About the Author
This article was written by Kory Becker, software developer and architect, skilled in a range of technologies, including web application development, machine learning, artificial intelligence, and data science.
Sponsor Me